PROJECT 3 [FINAL PROJECT]

A[LIVE] URBANISM CAPSULE
In this final project, we required to design a container for compact living. this container will be designed specially for the given architect which is Bryan Cantley for mine.
The requirements for this project : 2 containers with 1200mm (L) x 2400mm (W) x 2850mm (H).
The container can be arranged in many arrangement, and later with our tutor, we will decided which arrangement we will use for the final project.
Then for the final presentation board we had to compose all drawings in 2 A0 with rendered by photoshop or manual rendering.
Then as the continues project from project 1 and to, we still need to design the container withe character of our architect.
Some photos of the project 1 and 2 :

Flash back to project 1 Visual research

Flash back to project 1 Visual Narrative

Flash back to project 2 Support Pod Design
PROGRESSION 1
As the beginning for this project, we had to make 5 or more mock-up with the layout plan and space programming sketch on butter paper.
After tutorial, i decided to choose the L arrangement with one part of the container slanted to the other container. Next for the last of progression 1, we did a pin up crit session for all sketches and the chosen arrangement with the layout plan and mock-up.


Some interior narratives

5 arrangement in 1 : 75 scale
SITE VISIT
After the progression 1, all of our class students and both lectures went to Ipoh Oldtown for the site visit. Our location located between the shophouses, using the empty space that now used for parking area. The area's dimension is 18000mm (W) x 88000mm (L). And the in the middle of the place, there is one alley with 2000mm width.


PROGRESSION 2
After the site visit, we had to make the layout plan, continue with one section drawing and interior perspective, include the mock-up. I decide to make the container into 2 floor, the ground floor and first floor. where the ground floor includes the bottom part of the slanted container. and the first floor includes of the bed room and toilet.
The given containers indicate the limited space. However reflect to my architect Bryan Cantley, therefore i made some interactive parts either the exterior or interior.


PROGRESSION 3
After got some revision from my tutor, i had to start with the other section (section B-B), some interior perspectives with the detailing design, oblique drawing, and 4 sides elevation.
After that, we have the last pin up crit session for every drawings such as ground and first floor plan, section A-A and B-B, interior perspective, oblique drawing, elevation, ad some narrative. Next, we had the final tutorial for revised all of our drawings, design, and concept before we do the final model making.

Ground floor plan, scale 1:50

First floor plan, scale 1:50

Exterior perspective

Oblique 30-60, scale 1 :50

Section A-A, scale 1:25

Section B-B, scae 1:25

4 Sides elevation, scale 1:75
Front elevation, right elevation, rear elevation, left elevation.

Meeting room perspective from outside

Kitchen perspective. The openeable kitchen and permanent pantry

Living room perspective

Bed room perspective at the first floor

Kitchen and gallery perspective
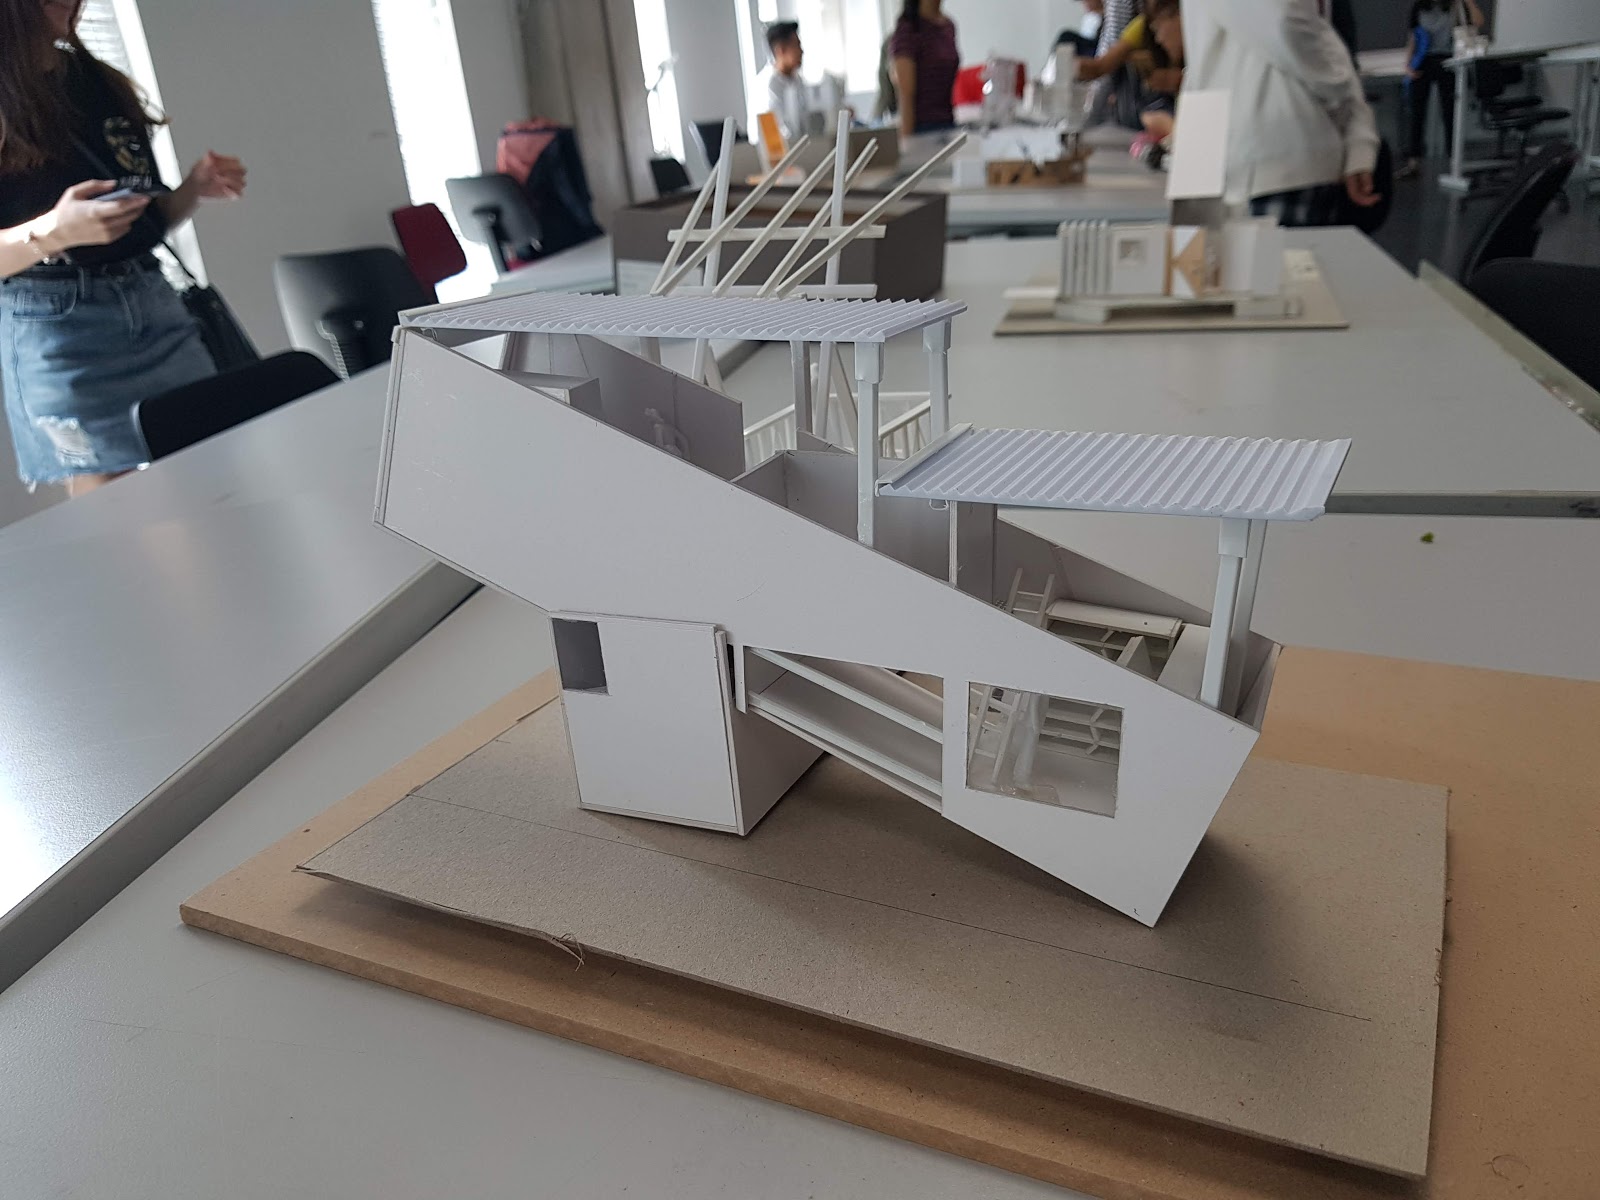
MODEL MAKING
After all of the drawings and design fix, we need to make a model making in 1 : 50 scale. The requirement, the model can only use modeling board or brown board, while the base for site context should be mdf board or gray board. And the model can use one color or even plain (white model).
After some consideration, i decided to make a plain or white model.


FINAL BOARD
Finally for the last progression, we need to compose all the drawings in 2 A0 and print in synthetic paper with foam board. Side from the all drawings, we also recquired to put the explanation of the site context, and give a title for our container with explanation a bit about our project and why we give name the project based to our title.


INTRODUCTION TO "CONSIER"
I named my project as "CONSIER". because of the character of the container design have many interactive mechanism either the exterior or interior. example for the exterior is the opening ceiling as the air way, openeable balcony, openeable wall as kitchen, openeable wall for meeting room. Then, some example for the interior like the rotateable cabinet from inside the container to the outside and also able to become a meeting table, moveable gallery partition, moveable bed mattress.
To access the container, need to use the platform and in the first floor there is a balcony that using the ground floor container's ceiling.
Side from that, in the corner at the right side of the container, will be putted the exhibition pod (project 2).


In this final project, i learnt the new experience from the final project in semester 1. Start from the site visit at Ipoh Old Town, make me feel our relationship between classmate be closer each other and also our relationship with both lecturers as well.
I also learn how to encourage my self to try all the best with give more efforts in every aspect. Specially for the final model making and final presentation board, i learnt how to manage my time, so i can submit and finish everything on-time. To manage all of this, mostly i did not sleep or reduce my sleep time to 1 or 2 hours per-day. However, side from that i also have to keep maintain my health due to my allergic always relapse when my immune in drop condition.
In this semester 2, i got many things from my classmate and my lecturers. So, in next semester i can change every bad thing, and learn to be much better then the previous one.
Thank you very much to all of my lecturers Ms Aida and Ms. Diana, and to all of my friends.


Komentar
Posting Komentar